Tuesday, August 28, 2012

Waiting

is something I struggle with sometimes. Like secrets. I have a hard time not telling everyone I walk past about something reallllly exciting that I just learned and am not supposed to say anything about. My friends know I WILL keep their secret no matter what [cross-my-heart-hope-to-die-no-fingers-crossed-triple-girl-scouts-honor] but while its inside the secret is bubbling and bursting just wanting to get out. You know being married helps with that though, you know... one flesh... so he gets to know... even if he doesn't want to...unless its a surprise for him...but that's different.

Anyways, back to waiting... since that's what this post is actually about, not secrets...

I recently applied for a new job. One that would be a MIRACLE/BLESSING/AWESOME opportunity [okay exaggerating a bit but still it would be one step closer to a "real grown-up" job since it has set hours instead of shifts and requires my college major]. But I am currently in that super painful waiting stage. It has been "Submitted," "Verified," and is now with the "Hiring Committee" to then be passed to my would be boss herself (it has to do with a school so that's why there are so many people it gets passed to).

I've been anxiously checking my e-mail and my phone for the past 3 days and the waiting is getting to me...then I came across this: 21 Reasons You're Not Letting Me Know About That Job

It made me laugh and you know what it made the waiting a little easier. Thanks Thought Catalog!

Cheers to waiting.

Sunday, August 26, 2012

Music Mondays: Get Up and Dance [in your underwear]


Some new music for you to wake up to (and dance in your underwear to because every Monday morning needs that sort of motivation). I found this thanks to Jessica over at How Sweet It Is, my go-to blog for when I have no idea what to cook on those rare days I'm not feeling kitchen creative  every day.

Cheers.

Saturday, August 25, 2012

Weekend Adventures [#buttermuffins]

We were in Cali last weekend.


It was wonderful to be with dear friends, go to the beach with surfboards [unfortunately it was THE flattest glassiest water I've seen in SB so we paddle-floated], wander through the farmers market, and eat at my favorite places [Summerland Beach Cafe is pretty much where we lived in the mornings our senior year of college, seriously their food is drool-inducing-fantastic]. 


And we stayed with these lovelies. These are my dear friends from college and most of them spent the last year all living together in a fun big house affectionately known as the "Jungle House". Once you see the house the name makes even more sense. 

We were up there (over there) for a quick visit and for the G-O-R-G-E-O-U-S wedding of our friends Josh & Jasmine. They are seriously the most beautiful couple ever  and they planned their simple and stunning wedding in less than 3 months. I wish I had photos to show you the wonderfulness but....I forgot to bring my camera out theentireweekend. [surprised??] so the photos I'm posting are actually lovingly borrowed from Elizabeth. 


These are the hundreds of cupcakes ["buttermuffins"] that the Jungle girls made for the wedding. 

They [Elizabeth and Rachel mostly] were tasked with making enough cupcakes for the ENTIRE wedding. The final count [minus the few many that were consumed for quality control] was 384. Enough for every guest to have 2. Elizabeth did the mixing and the rest of us assisted in scooping into pans and frosting. 

There were 3 kinds: Vanilla with Buttercream frosting, Lemon with a Simple Lemon Frosting, and Blackbottom. 


Didn't they turn out awesome??? They were delicious too!


Us with the Queen Baker of the weekend. We love you Ebeth! and Congrats Josh & Jasmine you are a beautiful couple! 

It was a much needed [but too quick] trip that needs to happen more often. We were so happy to get away before the craziness of school and the cooler weather begins. 

Cheers [buttermuffins].

Wednesday, August 15, 2012

Side Table [Pallet Redux]

Finally. A post about our pallet table project!

We went down to phx this weekend to do the build because N's dad had all the equipment we needed. [it would have taken WAAAAYYY longer to do the build up here even if we had a table saw]. About halfway through we were asking ourselves why we decided that doing a project outside when it's 115 degrees out was a good idea...it was just plain HOT! But despite the heat, we got it done [with lots of water breaks] and they turned out AWESOME!!!!!!!!

Check out some photos of the build below: (and check out the "brag post" of this build featured on the Ana White blog!)


Cut a little here.


Measure some there.


Stack 'em up.


Frame building.


Not sure what we would have done without the nail gun. It made it so much easier.


The framework.


Cut a little more.


Ta Da!


The design details for me to remember you.


Sanding.


Staining.


The finished product! [i will get a photo of them in our bedroom soon. the lighting when i was writing this post was terrible but i wanted to get it posted so you'll have to wait. they look even better next to the bed!

Build info: We used the wood from 3 pallets to make 2 of these tables with about 6 planks left over [for another project]. Because of the weird board measurements we ended up ripping the boards to a reasonable width before building. It made them more uniform. We used a nail gun to attach the pieces and finished them with a dark wood stain that my in-laws had in their garage. We got the design inspiration here.

We had so much fun doing this project and when were done both N and I were wishing we had the space for a table saw and nail gun for more projects like these. This definitely won't be the last build we do!

Email me or comment if you have any specific questions about the build and how we did something.

Cheers.


Friday, August 10, 2012

Star Wars for the Ladies

Let me indulge my inner-nerd for a moment...

I came across this article today about Princess Leia [and why she's a badass] and thought that it needed to be shared. 
{Click the photo for the link}

Cheers.
 [and may the force be with you].

Thursday, August 9, 2012

Thursday [Morning]

 Goodmorning! 

Guess what's for breakfast???


Yep....Blueberry Pancakes!!!
[smothered in Four Fruit Maple Syrup, a cinnamon latte, and some OJ]

Things like this make a non-morning person like me quite happy to get out of bed.

Cheers.

Wednesday, August 8, 2012

SunBurst Mirror DIY

Between my Pinterest and blog obsession, for the last few months I have been dreaming longing lusting  after a Sunburst Mirror to hang in our little studio...

Inspiration images Found via Pinterest. Links to originals: Upper Left, Lower Left, Center, Right.
However, I wasn't ready to spend big bucks to buy one. Through my searching, I discovered that it's pretty simple to make them. So began my search for a small mirror and something to use as it's base...

This is what I came up with and it turned out pretty good! Even N was impressed. 

Here is how I did it:

You'll need a silver charger [$1 from Michael's], wooden skewers [I had these laying around], a round mirror [$4 from Michael's], a piece of thin cardboard cut to match the mirror, hot glue, spray paint [I used the silver that I had from another project].

Glue 6 full length skewers to the center of the charger -pointy side inward- at equal intervals. Then glue a full length skewer about an inch away from the center equally in-between the ones glued to the center. Then cut 16 skewers the same length- about 3 inches off each one- and glue those next to the long skewers that are an inch away from the center. [I just used kitchen scissors to create a groove in the skewer and then broke them by hand, it was pretty easy to do it this way.]

Hint: Lay them out in the patter you want before gluing, it helps you get a visual of what it will look like. Also, use glue on the bottom of the skewer and then go over the top of them with more glue. It'll help it stay better. 


Once the glue has dried completely, carefully move it outside onto some cardboard and spray paint the desired color. I used silver as a base coat before going over it with a gold acrylic because I wanted a tarnished look to it.


This is the gold I added because the silver was too much for our place...though if I ever want to change colors it won't be too hard...


After the paint dries, attach the cardboard to the back of the mirror with glue and then glue the cardboard backed side to the skewers. [I then went around and squeezed more glue between the skewers and cardboard to make sure it stayed]. Then place something heavy-like your husband's HUGE physic's textbook- on top of the mirror to press it down tight. Leave it for at least 1/2 hr.

Then glue a piece of ribbon or wire to the back of the charger and you're ready to hang it!


Now step back and admire your hard work [all for under $10]. Ours is bigger than I realized it would be so that shelf/mantel idea may not work here, but I like the SunBurst so much that I don't really care.

Cheers. 

Tuesday, August 7, 2012

Projects of the Week

Because it's been like this off and on during the day for the last 2 weeks...


I have been lazy not been able to finish these projects that I started a while ago. But that's changing this week! Remember those pallets that I told you about??? Welllll
                          

I took them apart! [Finally, N has been asking me for the last 2 weeks to take them apart "SOOOON", meaning "Honey please for the love of space take them apart NOW! I'm so sick of walking around them on our little porch!!" But he was oh so patient with me [I am in awe of how this man can love me with all my crazy ideas and projects] and let me take my sweet time.


He came home yesterday and gave me a HUGE kiss when he saw that they were gone from our porch and was impressed this morning when we got into the 4Runner and saw the decent pile of wood we I got from them [yes he helped with the first one the other day].

We're headed down to Phoenix this weekend to cut, sand, and build these boards into their new form using my father-in-love's tools because we are too short on space and $$$ to have the tools we need on hand. *sigh* someday... I promise to show you the step-by-step process and how it turns out, hand-on-my-heart-girl-scout-promise.


This mess is my other project to finish. Its one of those sunburst mirror things. After much searching, I finally found the perfect size round mirror. [We don't have Hobby Lobby up here or else that would have made my search easier]. And I started it using hot glue...however that didn't work out too well. The mirror didn't stay attached and pulled some of the skewers off...I'm going to try guerilla glue now and see if that works...

Once the sunburst thing get finished it will go on this project...

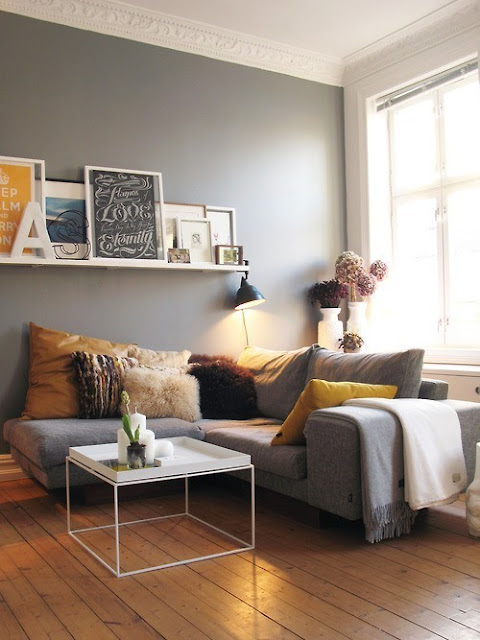
Found on Pinterest. Link is here.
This shelf/mantel is going above where N's desk and computer is with a collage of framed photos, the sunburst mirror and other things. 

So those are my projects for this week! I have a job training thing all next week on top of everything else, then a wedding in CA after that so it's now or never for these projects!

Cheers.
Friday, August 3, 2012

Four Fruit Jam [love]

I found this at the store today and I am OBSESSED. Like take spoon and eat it straight from the jar obsessed. I am currently trying to figure out how I can eat it for dinner...


Yum...I've had it on toast, on vanilla ice cream, on a spoon...any other ideas?

Cheers. 
Related Posts Plugin for WordPress, Blogger...